Support for the Atmel SAM D20 Xplained Pro board. More...
Detailed Description
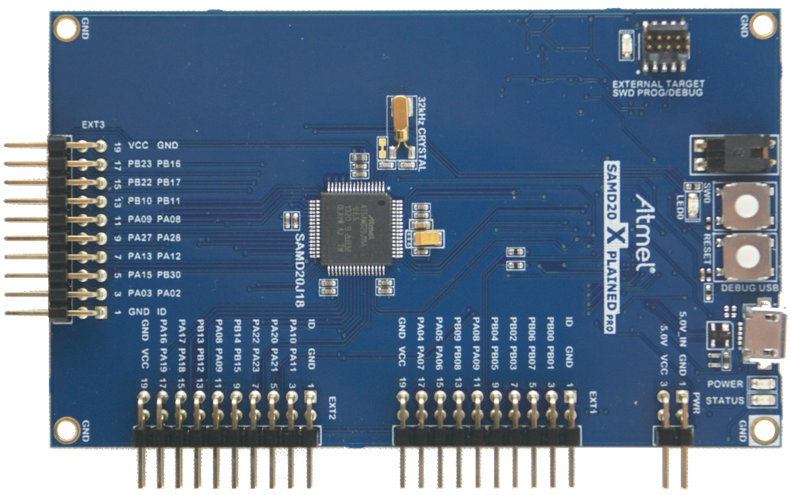
Support for the Atmel SAM D20 Xplained Pro board.
Overview
The SAMD20 Xplained Pro is an ultra-low power evaluation board by Atmel featuring an ATSAMD20J18 SoC. The SoC includes a SAMD20 ARM Cortex-M0+ micro- controller. For programming the MCU comes with 32Kb of RAM and 256Kb of flash memory.
Hardware
MCU
| MCU | ATSAMD20J18A |
|---|---|
| Family | ARM Cortex-M0+ |
| Vendor | Atmel |
| RAM | 32 KiB |
| Flash | 256 KiB |
| Frequency | up to 48MHz |
| FPU | no |
| Timers | 8 (16-bit) |
| ADCs | 1x 12-bit (20 channels) |
| UARTs | max 6 (shared with SPI and I2C) |
| SPIs | max 6 (see UART) |
| I2Cs | max 6 (see UART) |
| Vcc | 1.62V - 3.63V |
| Datasheet | Datasheet |
| Board Manual | Board Manual |
User Interface
1 User button and 1 LED:
| Device | PIN |
|---|---|
| LED0 | PA14 |
| SW0 (button) | PA15 |
Flashing the device
Connect the device to your Micro-USB cable using the port labeled as DEBUG USB.
The standard method for flashing RIOT to the samd20-xpro is using edbg. by calling: make BOARD=samd20-xpro -C tests/leds flash
Note that on Linux, you will need libudev-dev package to be installed.
Users can also use openOCD to flash and/or debug the board using: PROGRAMMER=openocd make BOARD=samd20-xpro -C tests/leds flash
On Linux you will have to add a udev rule for hidraw, like
Arch Linux
With yaourt:
Ubuntu
Although this refers to setting up the SAMR21, this guide is still very helpful to understanding how to set up a solid RIOT development environment for the SAMD20: http://watr.li/samr21-dev-setup-ubuntu.html
Known Issues / Problems
Files | |
| file | board.h |
| Board specific definitions for the Atmel SAM D20 Xplained Pro board. | |
| file | gpio_params.h |
| Board specific configuration of direct mapped GPIOs. | |
| file | periph_conf.h |
| Configuration of CPU peripherals for the Atmel SAM D20 Xplained Pro board. | |
